Week 9 : Designers First
As is evident from the title of the blog, this week involved taking more steps towards making our tool more accessible to designers. There were a few AI experiments and bug fixes. However, we did not see any improvements in the winrate (currently at ~70% for our base deck). The real progress this week came from the app building end which focused on making our tool more friendly for designers. This was our main focus last week and has continued on for this week as well. Currently, we are tirelessly working towards building a single application for playtesting it with designers on Nov9-Nov10 . Needless to say, this will be the focus of our work for this and next week as well.
AI Updates
This week consisted of several experiments without yielding any significant results. There were also a couple of bug fixes which help present data more accurately in the training excel sheet.
Recurring Reward Drop Bug Fix
Continuing from the previous week, the focus on the AI front was to figure out why the reward was dropping periodically during AI training. An example of this from last week can be seen below.
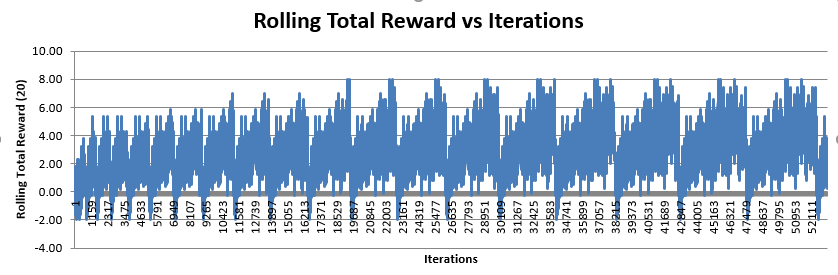
The theory we initially came up with was that something was going wrong which caused the agent to ‘forget’ everything it had learnt and start again from scratch. However, the actual reason did not have much to do with the agent. In fact, there was a bug in the data collector script which is responsible for collecting and storing data from the training process and then writes it to the excel sheet. After fixing the bug, the training graph now looks something like this:
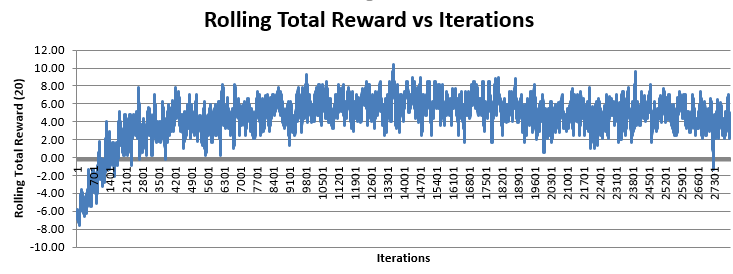
This graph now looks much more like a reinforcement learning reward graph with steep rise in the average reward at the start and then becoming stationary over time (with some noise).
Start with High Discounting Factor (Gamma)
One of the things we tested this week was to keep everything else the same but start with a high gamma value. The reason we moved to an incremental gamma earlier was because the model would hardly learn anything and would converge very early to the reward value of playing an unplayable card. Meaning, it would try to keep playing unplayable cards and keep losing.
So why did we try this again. We wanted to lay more emphasis on future rewards because it could be the key to further improve our winrate. Also, now that we had a model which could give stable results, we figured we could go back to the earlier method and see if we can make it working with help of our newer model.
Unfortunately, the model suffers from the same problem it did before. The model never even crosses the first step of learning which are the playable cards in the current turn and playing one of those.
We also tried bootstrapping the model using a trained model which had a ~70% winrate. Even this did not really change anything. The model still was not able to learn how to play playable cards. We think the problem here is that with a high gamma, what can happen in the next state take precedence over the current state and causing an unrealistically high q-value for unplayable cards.
Desktop App – Design
We now come to the desktop app design which is where a lot of effort was focused this week. Last week we made a decision to use electron to build a desktop application which includes all tools. We had just started to learn how to use electron. This week we have made solid progress on several key features of this app.
The following are some of the features we implemented this week:
Environment detection:
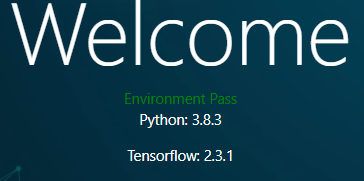
Our project relies on a specific version of python and tensorflow. Thus, we need a mechanism to ensure that the user has the environment to run our application properly. We are now able to detect the environment when the application starts. Next step is to help install modules of the environment if the user doesn’t have them.
Game Project management:
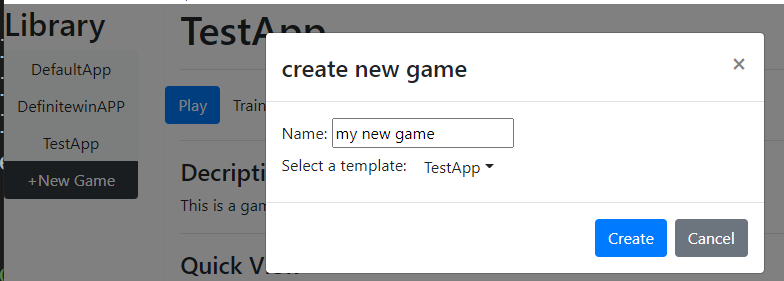
As designed before, our app can have multiple games with different cards, rules and decks. Hence we need to allow the user to view existing game projects and remove and create new game projects by just clicking buttons.
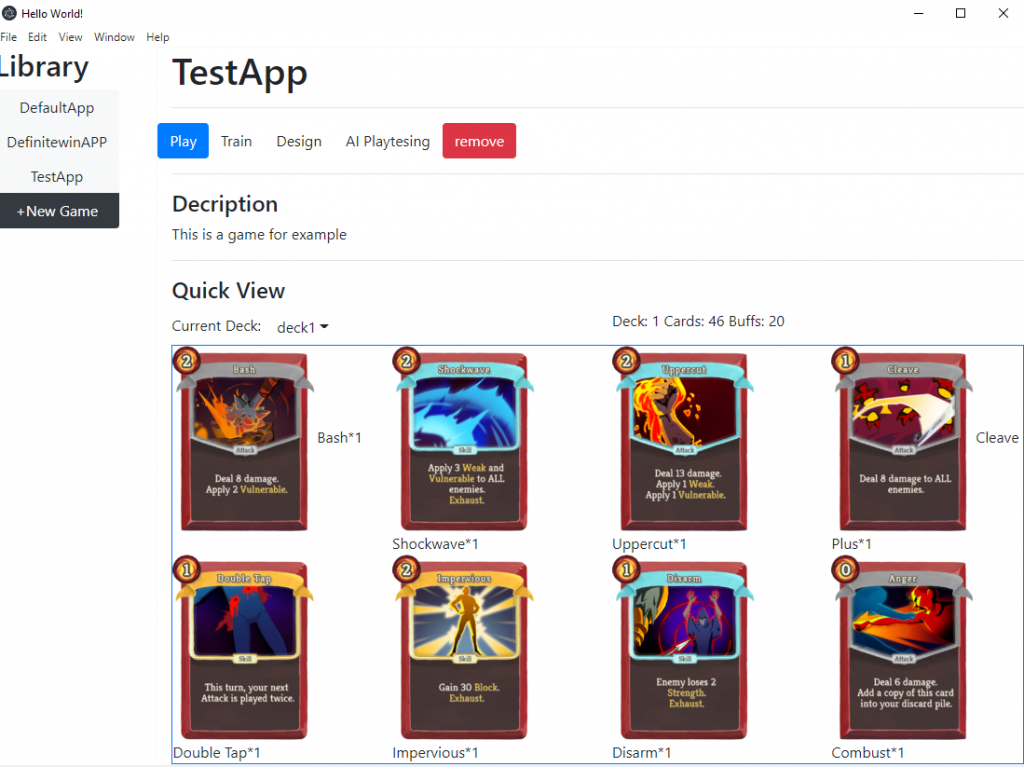
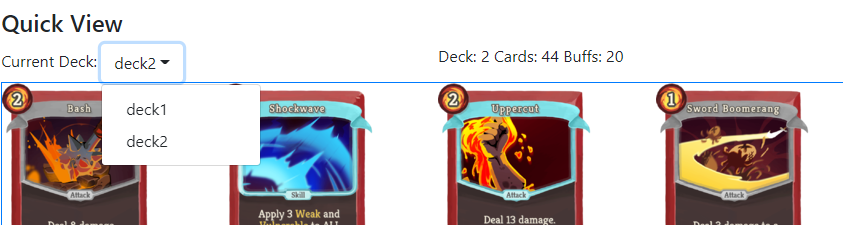
Quick view and shortcut operations:
We implemented this “quick view” section on the game’s page (picture below). The purpose of this section is to let users have a basic understanding of what games look like( what are cards in the deck, which deck am I using, etc). Another goal is to facilitate shortcuts operations like switching to another deck.
Main operation of a game project:
We have several operations we need to build for: play the game, design the game, playtesting or train the AI. This week , we made “play” and “remove” operations work. When you click “play”, electron will launch the Unity app to load the game you select.

Desktop App – Components
Our app is a single place for many different aspects of playtesting with AI that is brought together as a unified system. Here are some of the key components that we worked towards this week:
Data visualization
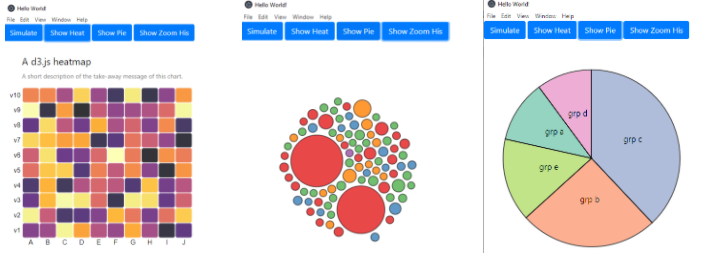
Data visualization might be the most important part of this app. However, drawing graphics, especially interactive ones, is quite difficult and could prove to be very challenging.
NAIVE/LOW-LEVEL SOLUTIONS
One of our discussed solutions was to draw data graphics by using svg, since html standards support this format. We could even use a library like WebGL. Even though this allows us to have highly customized graphics to show our data, building a data visualization module from scratch is out of our scope and involves a lot of unnecessary work.
DATA VISUALIZATION LIBRARY
We then turned to Javascript, which has many data visualization libraries. We finally choose d3.js (https://github.com/d3/d3 ) among others for 2 reasons:
- Independent: Many other data visualization libraries( such as Victory, Rechard,etc) only work with some front-end frameworks like React and Vue. d3.js is easier to integrate since it only needs javascript
- Community resoruces: We found that there were abundant templates and tutorials of d3.js on the internet.
Database
There is a lot of data that can be manipulated using this app. This week we also wrote a database module in javascript to manage that. We had 2 options for this:
PYTHON DATABASE MODULE + RPCS:
We already have a database module implemented in python. Javascript uses a RPC mechanism to call python to get the query result. This is nice because the code is consistent and doesn’t have duplications. However, building RPCs, even with 3rd party libraries, is highly time consuming.
JAVASCRIPT DATABASE MODULE (OUR CHOICE):
We decided to write a javascript database module because we found this to be the quickest. Even though there are duplicated code both in python and javascript, it is under control because over 70% of the functions of the current database are all about reading and parsing static files. As long as we make the rules of static files’ paths and names consistent, javascript and python can all follow these rules.
Multi-processes design
A lot of the core logic of our app is written in different languages. For example, we use Unity to build game GUI but AI and gameplay are implemented in python. So our desktop app has to be a multi-processes one.
Electron has good support for managing child processes. As for process communication, we are still using sockets because we already have this codebase on the python side.
Below is a relationship of the different processes:
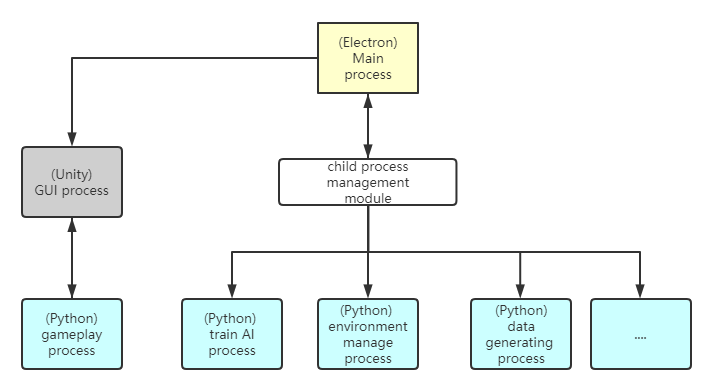
Why do we separate the python gameplay process with other python processes? : The nature of inter-process communication is different. Communication between unity GUI and python gameplay is much more complicated than others. The protocol between them is a comprehensive client-server style. But the communication between electron and python is RPC style: just call functions and get results.
Another reason is that historically in our project, communication between Unity and python gameplay is highly completed. There is no reason for electron to act as a middle man passing messages between them.
Card Editing and Deck Building
This week our team discussed card and deck editing functions. The two functions were separated into two different pages, but we improved our design by creating a dashboard to visualize the current player’s cards and deck at the same page. The idea we got referenced the popular card game by Blizzard called Hearthstone. We want our card/deck building system to look similar to the screenshot below from Hearthstone:
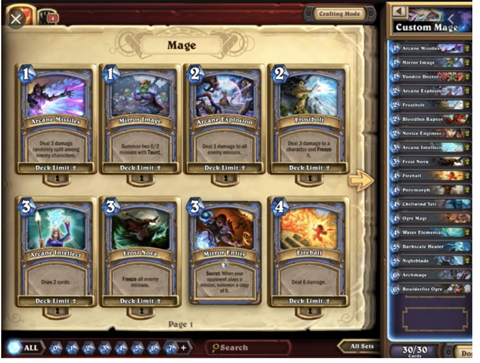
The picture above is a screenshot of deck building in Hearthstone
Inspired from this, the following are the function specifications that we are implementing.
Dashboard page:
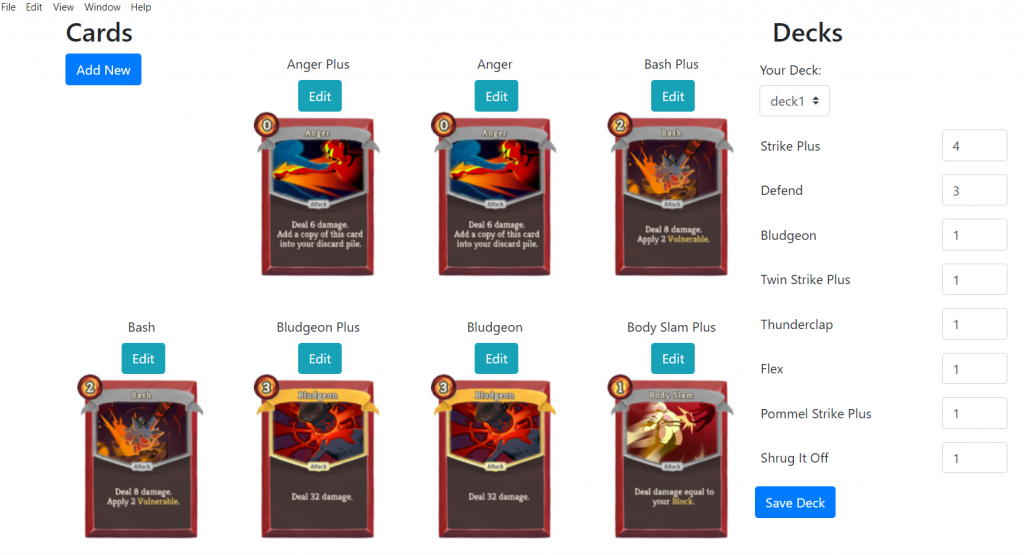
This page shows existing cards and deck information in a particular game version. By modifying card and deck data, users can build a custom deck, trying their own combination of cards to playtest a game version. Here are some functions that we have built for this system:
- Card:
- Add a new card: go to a page where users can fill in information and create new cards. (done)
- Edit card: go to a page where users can modify information for existing cards. (done)
- Delete: click to delete card.
- Add to Deck: add this card to deck.
- Search: search by name.
- Filter: filter by energy or other custom criteria.
- View card information: hover on card picture to show description.
- Deck:
- Save: save changes being made by the user. (done)
- Indicator: Changes being made will be highlighted in light blue background.
- Add new Deck: add new deck.
- Undo
A screenshot of our current dashboard page can be found below:
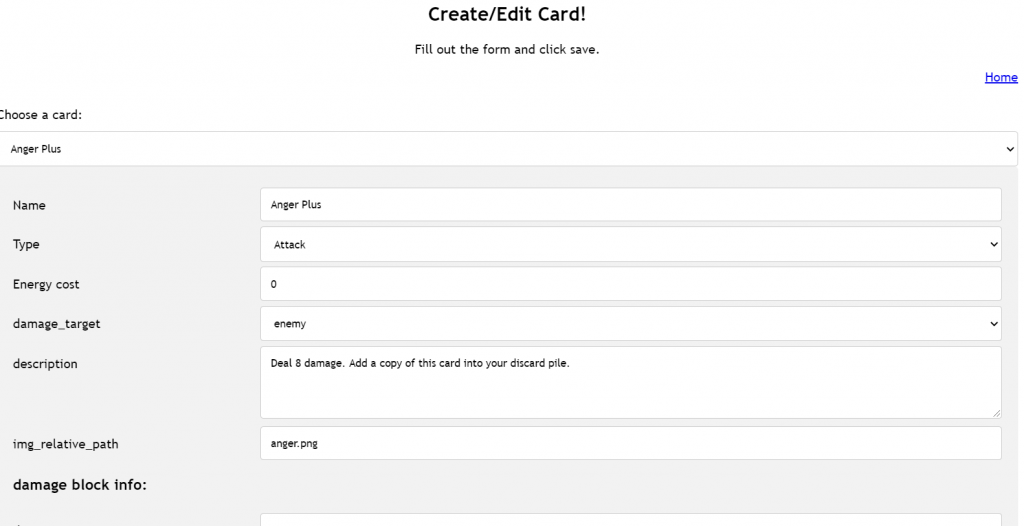
Edit Card page:
The purpose of this page is to create custom new cards and modify existing cards.
- Select bar: Select bar to jump to another card editor. (done)
- List information: List all information required to create a card. (done)
- Save: save changes being made by user. (done)
- Indicator: Changes being made will be highlighted in light blue background. (done)
- Sanity check: input number should be in the range between 0 to 100. (done)
- Add buff: Add existing buffs to a card.
- Image upload: click to upload custom image.
Screenshot of the Edit Card page is shown below:
UI Design
Based on the design and architecture described above, we did some UI design for what our app should finally look like. Below are screenshots and description of the same.
Home Page
Left Navigation bar is similar to the Epic Games Launcher. The functions on the sidebar include:
- Home: Home page, our website, resources, etc.
- Library: Game app, you can create different game apps here.
- Cards: Create cards in a pre-selected game app.
- Decks: Create decks in a pre-selected game app.
- Training: Start a training program in a pre-selected game app and card deck.

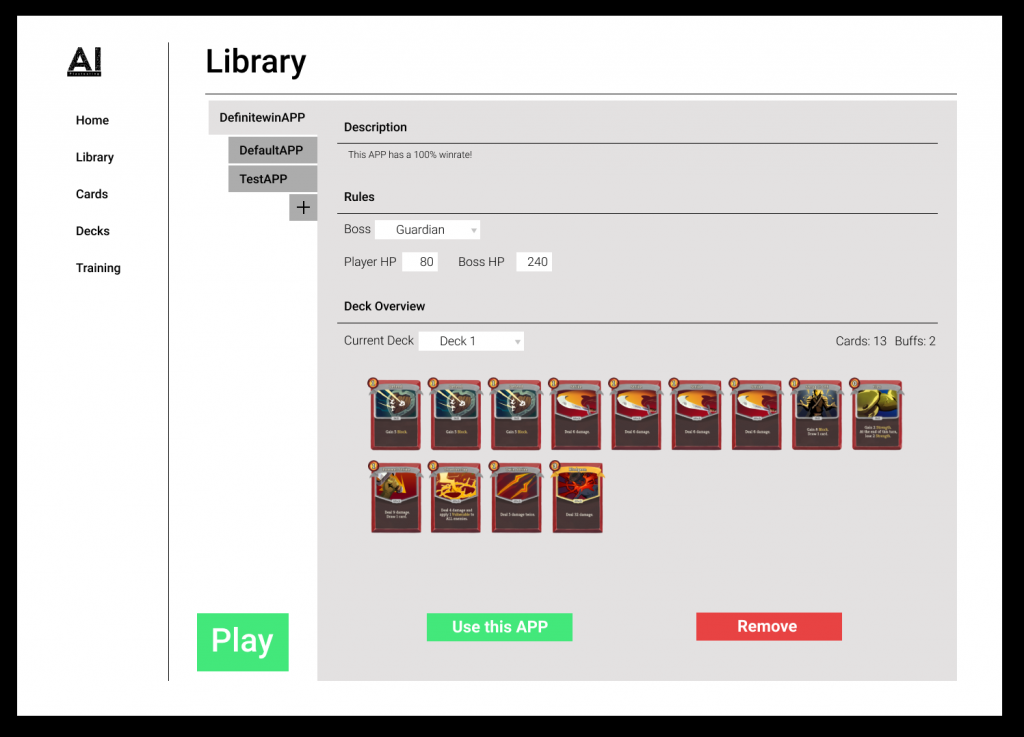
Library Page
Left tabs shows a list of all the current game versions.
- Description: Description of this game version.
- Rules: Rule set of this game version.
- Deck Overview: An overview of all the decks and the option to select one.
- Use this App: Select a game version
- Remove: Delete this game version.
- Play: Play this version of the game in Unity.
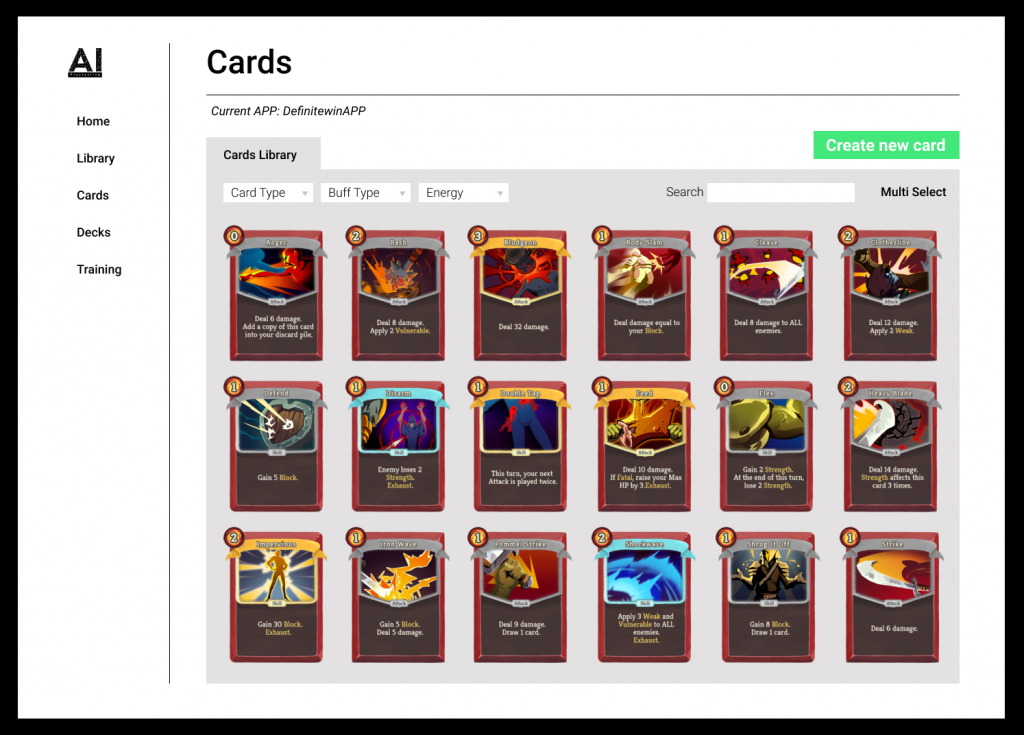
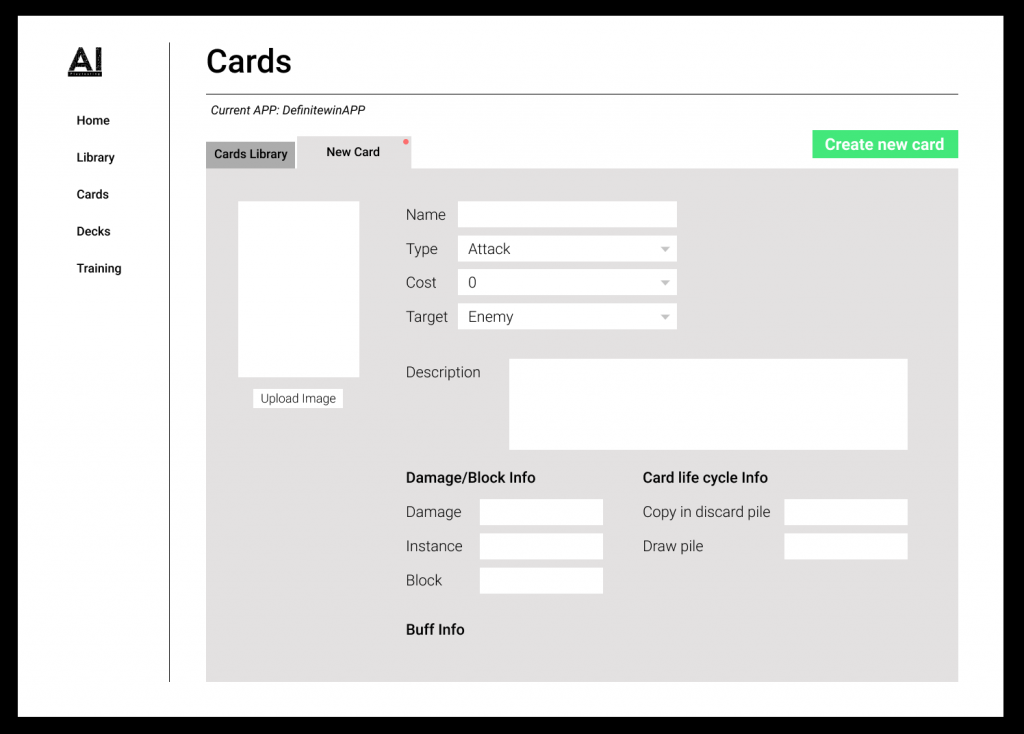
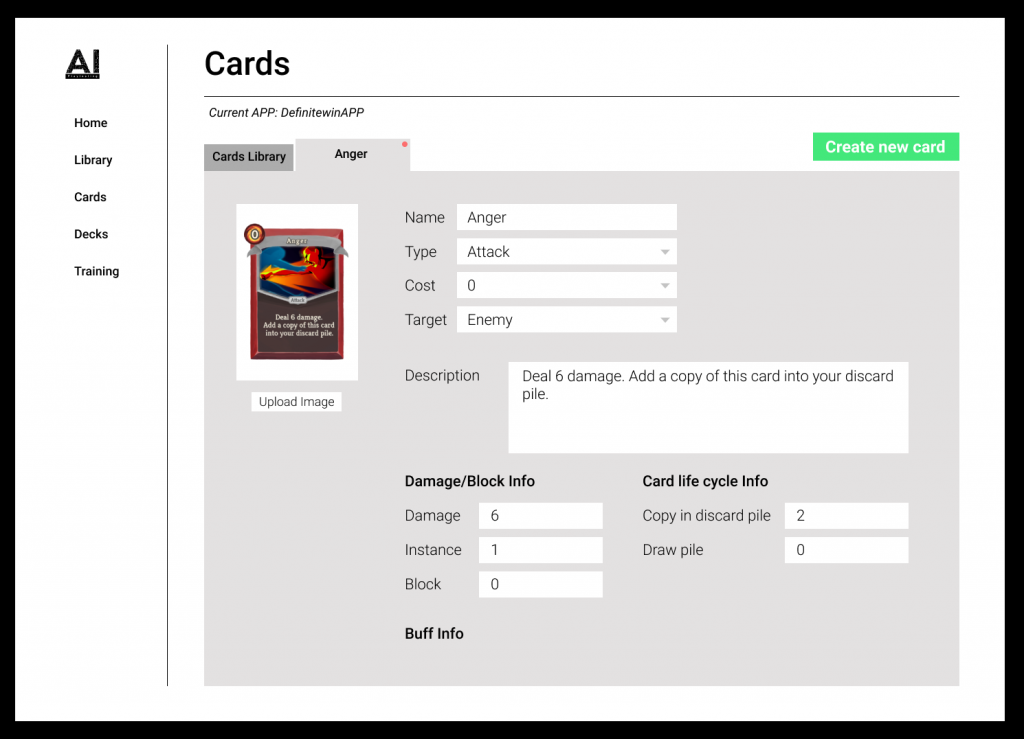
Cards Page
A page that shows all cards.
CREATE NEW CARD
EDIT EXISTING CARD
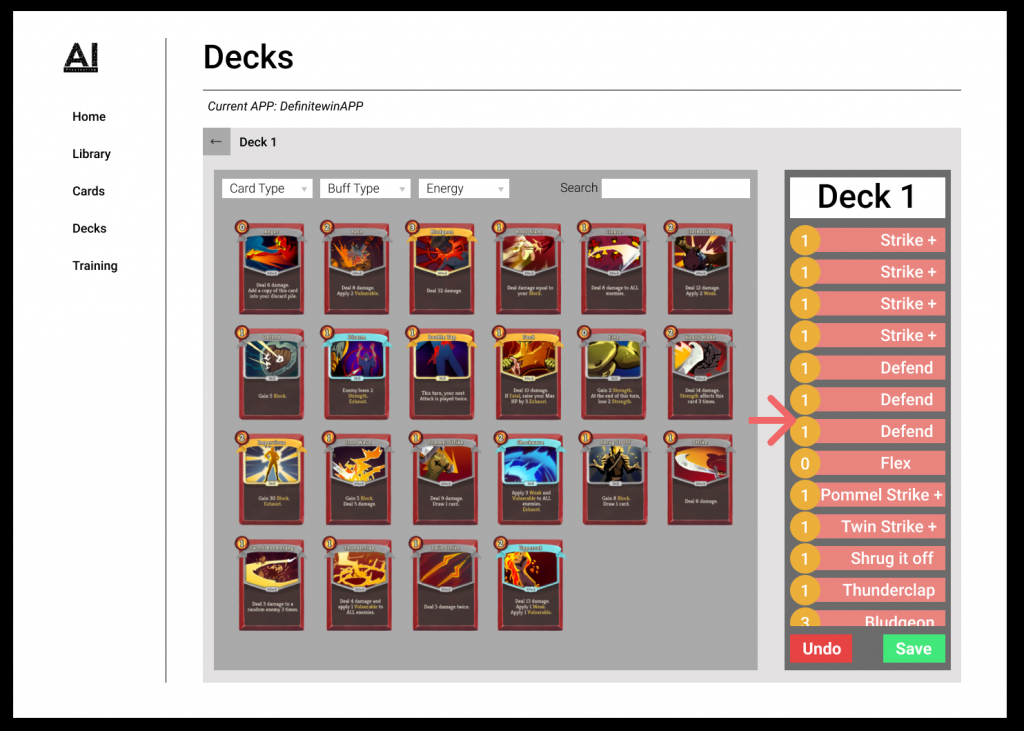
Deck Page
A page that shows all the deck in the current game version.

DECK EDITOR
All in all, this week saw a lot of progress on building the app. The next week is also going to focus heavily on building the app because of our playtesting deadline. We hope to create something that is simple enough for designers to use!